zondag 18 augustus 2019

POLKADOODLES CRAFTS AND UNIQUE STAMPS, TUTORIAL on How to create a VINTAGE INSPIRED CARD WITH TEXTURES


Hello there, today it is my turn, Terry, to give you some inspiration on the Polkadoodles Inspiration Blog. I have made a vintage looking card with lots of soft colors, made with lots of the newest stamps and stencil. How I made it I will show you in this Tutorial 


I started out by cutting a 15 x 15 cm piece of paper. Here I started to work with some colors, divided the colors by spraying some water on it until I thought the colors were soft enough. At first I wanted to use all 4 colors, but in the end I used only 3 colors....


Before using the stencil, I first ensure that the paper has a layer of Gesso, wanted to "lighten up" the background color a bit.....


Then I thought that first I could stick some ripple paper on my background paper, then the pigment powder and with some water the colors ran nicely on the paper. I also used a paintbrush to "help" the water with the color run through the rest of the background.......


So finally I was ready to play with the Number Collage Stencil


Do you know that most crafters are busy with something and suddenly have in their head that it still needs a color? So I had that too lol.....I added some white paint on the background 


and some crackle had to be added on there too. Then I grabbed the Vintage Text stamp and stamped it on different pieces with 2 different colors


The background paper was dry after I dried it with the Heattool, then I started stamping around with the Doodle Borders stamp


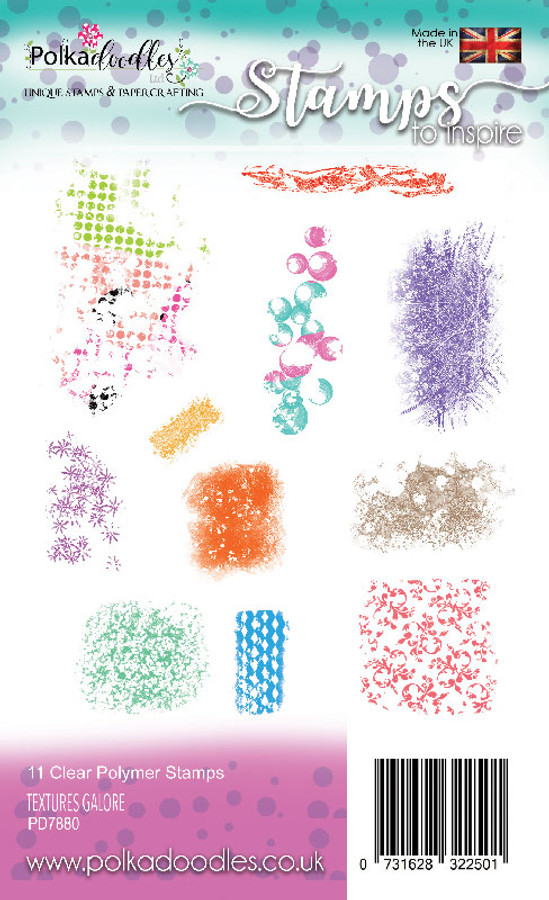
Did not think that that was enough so I took the Texture Gallore stampset en stamped on the background paper some more to fill in the blanks....


Did you know that Polkadoodles has just wonderfull Glue Pen? I played with it to glue my butterflies onto the card. It works really good I can tell ya that.....so if you do not have a Glue pen like this, you better purchase it cause it is just wonderfull......


So I had 4 butterflies from 2 different stampsets (Bella Fleur and Flower Collage Stampset) and colored with Distress Inks and placed some crackle on top of them, after I was finished I Glued them onto my card.......


From the Hello Friend stampset I stamped the sentiment Each New Day is Special and this one is no different, I cut it into pieces and glued it onto my card


All around the sentiments I played with a black fineliner to let the words "pop" out of the card. I think I did a pretty good job on that lol....


With that same fineliner I scribbled on the butterflies


So there you have it, I hope I have given you some inspiration on how to make a Vintagy card with lots of stamps, stencils, color
Can't wait to see your creations....

Thanks for stopping by and hope to see you soon.


The Polkadoodles Products that I have played with are:

Textures Galore stamp set -  11 clear Polymer stamps


Vintage Text clear stamp set


Thank you so much for visiting my blog and hope to see your creations soon.

I would like to join into the following challenges:


zondag 4 augustus 2019

POLKADOODLES CRAFTS AND UNIQUE STAMPING WITH POLKADOODLES-TUTORIAL

Hey there crafters out there, it is my turn Terry to show you how I made a colorfull card with loads of flowers from the Pretty Perfect stampset. 

Excuse me for not making more than 2 photographs but I was so enthousiastic to start my project that I forgot to take more pictures........ 

Are your ready for some inspiration?
Sure hope that I can give you some with this tutorial.....

What I did was, First of all I started out with a piece of cardstock. I have cut out a white card of 22 cm x 11 cm.  

I have colored the background with 3 colors of distress ink. Let it dry very well using the Heattool and after that I started stamping on the card with the Pretty Perfect Stamp Set.


I have colored the background with 3 colors of distress ink. Let it dry very well using the Heattool and after that I started stamping in othe card with the Pretty Perfect Stamp Set. After stamping, I used the heattool again to dry the stamping ink well. When I finished that I dipped a waterpen in chlorine and started to "color" the flower stamps. The great thing about chlorine is that the colors that were under the stamp fade away and therefore become allmost white. 


And than you get this result check out the "white" flowers....I just love them.... After I finished that I started to fill up my card with the border stamp from the Doodle Dragonfly set and stamped it all around my card. Also a few hearts were stamped on the card.
I was thinking to color the leaves and so I did. I colored them with Zigs and the tiny flowers too. 
Than all the card needed were some sentiments. Did you ever try out the Sentimentals from Polkadoodles? Well if you never used them I suggest you try them out and better use them cause they are so much fun to play with. I used the "You are a very Special Kind of Special Friend" and cut them all into tiny words and divided them on the card. 

So there ya go, my card is finished and I sure hope you will have asmuch fun as I did making this card. Can't wait to see yours....

The products that I have been working with are:

Sentimentals 6 x 6" paper pack    Pretty Perfect Collection - Craft Stamps, Papers & Stencils     Doodle Dragonfly Clear Stamp Set

Sentimentals                                    Pretty Perfect Collection              Doodle Dragonfly


Have fun and thank you for coming over and checking out my Tutorial.


I would like to join into the following challenges:

Creative Artist Mixed Media Challenge #52

Brown Sugar Challenge Blog, Challenge #292

QKR Stampede Challenge #359

A Inky Mess Challenge #33

The Artistic Stamper Creative Team Blog, August Challenge, Anything Goes