dinsdag 4 december 2012

Noor Design Blog, Guest Designer Vintage Card....


Hallo ladies..... Noor! Design heeft weer ontieglijke leuke spulletjes in deze maand  uitgebracht en ik heb er weer een projectje mee gemaakt.......en als je op het logo klikt van Noor Design dan brengt de link je naar het blog toe....


And for the English visitors......

Hiya guys,
 Noor! Design has a lot of nice products released in this month you really gotta check it out guys.....I made another project with some fun stuff. You just gotta check out the Noor Design blog, if you click the banner it will take you there.

Hallo allemaal voor het Noor Design Blog heb ik weer een Vintage kaartje gemaakt, daarbij heb ik gebruik gemaakt van een aantal Noor Design Mallen en het Vintage Paper Bloc.


Neem een stuk cardstock van 15 x 30 cm en vouw hem zodat je een kaart van 15 cm krijgt.
Neem een stuk Vintage papier van het Vintage Paperbloc en snijdt hem op 14,5 x 14,5 cm.
Plak een stuk Vintage Papier van het Vintage Paperbloc en snijdt hem op 13,5 x 13,5 cm en plak deze op de 2de laag.
Bewerk alle randen met Inkt om een vintage effect te krijgen.

Take a piece of cardstock from 15 x 30 cm en fold the cardstock untill you get a card from 15 x 15 cm. Take a piece of Vintage paper from the Vintage Paper Bloc and cut a piece from 14,5 x 14,5 cm.
Glue it onto another piece of Vintage Paper and cut that piece 13,5 x 13,5 cm and place it onto the 2nd layer. Work on all the edges with ink to create a Vintage effect. 
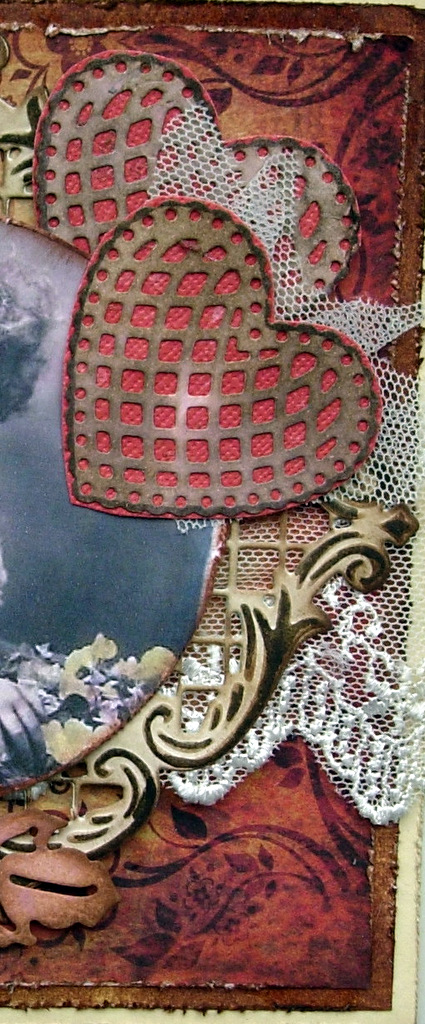

Snijdt de hart stans Floral Flourishes Hart 6003-0005 2 maal uit en plak deze op een stuk rode cardstock. Ik heb een stukje kant tussen de 2 harten geplaatst en daarna op de kaart geplakt.

Cut the heart from the Floral Flourishes Heart 6003-0005 twice and put it onto a red piece of cardstock. I have placed a little piece of lace between the two hearts and after that I placed it onto the card.


Snijdt de Floral Flourishes Blad 6003-0007 2 maal uit en beinkt deze.
Cut the Floral Flourished Leave 6003-0007 twice and work on it with ink.


Snijdt een Vintage plaatje uit en plak deze op de uitgestanste mal. Daarvoor heeft ze de Cutting en Embossing Stencil Frame Vierkant 6002/0147 gebruikt.
Plaats een stuk kant onder je stans en plak deze op de kaart.
Als laatste heb ik een aantal roosjes van verschillend formaat beinkt en deze op de blaadjes geplaatst.

Cut out a Vintage Image and place it onto the Die, I have used the Cutting and Embossing Stencil Frame Square 6002/0147
Place the lace underneith your Die and glue it onto your card.
Last but not least I have placed some roses onto the leaves and they have different sizes.
Have lots of fun and if you want to see lots more of inspiration you can check out the Noor Design Blog....


maandag 3 december 2012

SIMON SAYS STAMP AND SHOW, SHOW US YOUR HOUSE RULES....

Hey there it is Monday so we have another fabulous NEW challenge over at the


And our generous sponsor is offcourse SIMON SAYS STAMP


They have another fabulous prize for a lucky winner and the prize is....

Isn't it just GREAT.....and if you never had the chance to visit the SIMON SAYS STAMP Superstore, then go right ahead and click on the linky....and you will be in crafters heaven wohooooooo.
So this week the theme is HouseRules......I just know you will come up with something fabulous......so get your crafts out on the table and join into the fun....

I made a Christmas House, a House filled with Joy, Love and Laughter


When I saw the theme for this weeks challenge, I immediatly was thinking about a sweet little bird house, it was just a perfect home piece for the challenge because afterall the little birds need a home too for Christmas. This house is filled with Joy, Love and Laughter and Family because I think that is what Christmas should be about. The picture is the back of the house.....filled with little detaills....hope you like what you see.......
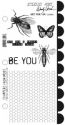

I worked on the background with the fabulous papers from Graphic45, wooden stars, those georgous snowflakes from The Tim Holtz and lots of assecoires.


 I played with crackle and placed a Christmas rose. and use Distress ink for all the borders, a pearlstring for the roof and snow at the bottom of the Christmas House.


And this is the last side of the Christmas House, I have placed a little Christmas Poem on it. also from the paperpack from Graphic 45......so are you ready for the front.....


There you have it and I love the little Christmas house.....filled with Joy, Love and Laughter.....I made this little house for my sweet friend Candy, because she just lovesssss Santa and Christmas so I have sent it over to her.....so he can join with the little Santa that is just sitting there and waiting on his house. and I had a lot of fun when I was making the Christmas house.....so you guys wanna have fun too....you can you know, only thing you have to do is go over to the Simon Says Stamp and Show Challenge Blog and do join into the fun, you even make a chance on a fabulous prize from our generous sponsor Simon Says Stamp and while your at it, just check out the AMAZING creations of my even more AMAZING teamies....come on over and do join into the fun.

Hugs xxxx


woensdag 28 november 2012

NOOR DESIGN GUEST DESIGNER....VINTAGE BAG


Hallo ladies..... Noor! Design heeft weer ontieglijke leuke spulletjes in de maand november uitgebracht en ik heb er weer een projectje mee gemaakt.......en als je op het logo klikt van Noor Design dan brengt de link je naar het blog toe....


And for the English visitors......
Hiya guys,
 Noor! Design has a lot of nice products released in the month of November you really gotta check it out guys.....I made another project with some fun stuff. You just gotta check out the Noor Design blog, if you click the banner it will take you there.
I have made a little tutorial on how to make the bag.....
Ik heb even en beschrijving gemaakt van hoe je het tasje kunt maken....

Werkwijzer
Tasje  van 11 x 14 cm bewerken, beinkt alle randjes van het tasje en van het cardstock.
Achtergrond papier 9,5 x 12,5 cm beinkten en op het tasje plakken.

So what you do is you take a bag from 11 x 14 cm and you ink all the borders.....the background paper is 9,5 x 12,5 cm I inked all the borders and placed the background paper onto the bag.


Noor Design Franse Lelie Stans beinkt en onder het vintage plaatje en in de hoek van het plaatje geplakt. 
I took the Noor Design French Lilly Die and inked all the borders and I glued it underneith the image.


De bloem uitgestanst en beinkt diverse lagen over elkaar heen en vast maken met een splitpennetje. De harten ook beinkt en achter de bloem geplakt. Een paar pareltjes erop voor decoratie en lint onder de bloem en onderaan het tasje geplaatst.
I cut the flower and inked all the different layers....and placed a few pearls onto the hearts....and some lace underneith the the flower...and my bag is done...

Je kunt elke afmeting van een “bestaand” tasje gebruiken om een leuke kado verpakking te maken.
You can use every messurement of an excisting bag to make a cute present.

Gebruikte materialen/ Used materials

VintagePaper Bloc 6010/0101
Veel plezier met het maken van een tasje...en kom even kijken bij het blog van Noor Design voor nog meer moois 

Hugs Terry xxxx


maandag 26 november 2012

SIMON SAYS STAMP AND SHOW, SHOW US YOUR PROJECT WITH HEART ....


Hey there you crafty people out there......are you in for a lot of fun...then you just have to come over to the 


Our generous sponsor is offcourse
 Simon Says Stamp....


wohooooo and what a fabby prize they have for one lucky winner.....


Isn't it just great.....
So this weeks theme is Show Us Your Heart, you can make whatever you like as long as it has everything to do with a heart.....and vintage......this is what I made for this weeks challenge....


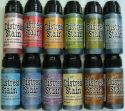
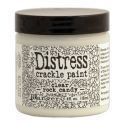
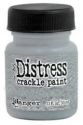
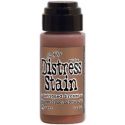
I do LOVEEEE hearts. I thought it would be fun to make a small project with such a HUGE heart in it. I worked on the frame with Tissue Tape, the Metallic Distress Stain and Metallic Distress Crackle Paint. 


On top of the frame I used the Georgous Stampset from The Wendy Vecchi. The background is worked on with Tissue Tape and covered with Crackle to give it a fragile look.....and I think that worked pretty good. 


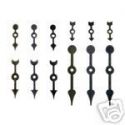
The heart was made out of Corrugated Paper and I placed a Spinner on top for more effect and to hold the chain. 

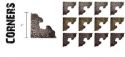
The border have a few Corners from The Tim and to give it that shiny look of silver I played with the Metallic Distress Stains. 


So there you have it guys.....the whole project when it is finished.....I love it....and what do you think?????? so if you wanna have lots of fun, then you better get your boody over to the Simon Says Stamp and Show Challenge blog....and join into the fun, you can even win a fabulous prize from our generous sponsor...so what are you waiting for.....and while your at it check out the fabulous projects my amazing teamies made....for  your inspiration....wohoooooo

So you better get your thinking crafting caps on and lets join into the fun....Enjoy...


Have fun...
Hugsss