zondag 24 februari 2013

PANPASTEL UK, CHALLENGE #8, HAPPY BIRTHDAY .....


Hey there guys, it is Sunday, so that means we have another fabulous challenge over at the PANPASTEL UK Challenge Blog...
Did you ever visit out 
 generous sponsor 


they have a fabulous prize for the winner of the challenge.....check out the store guys, and you will have fun

The theme for this weeks challenge is HAPPY BIRTHDAY......You can make whatever you like as long as it has something to do with our theme for this week.....
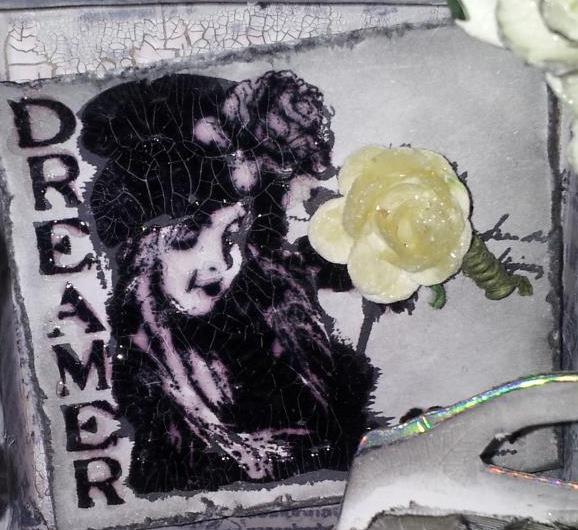
This is what I made


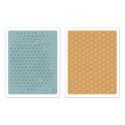
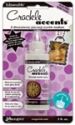
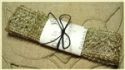
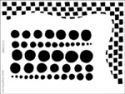
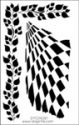
I made a little Birthday Bag or Purse even.....and this is the background of my project....I worked with the Violet Panpastel, Violet Tint and Titanium White one.....they are so much fun to work with....I worked on the background with the Dyan Reavely Stencils...colored the leaves first with the Graph-It Markers....after that used the panpastels and played with Glossy Accents and Crackle Accents to give it a dimensional look....they just look like waterdrops...pretty cool if I say so myself.


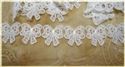
Oke so tha back also has a few flowers and on top I placed some two colored roses....and offcourse a sentiment


This is from the front of my project, I chose a vintagy image that I found on Pinterest...I really like this springy girl with the little birdie and the flowers....and worked on the image with Glossy Accents and Crackle to give it a bit of a dimensional look.


And I placed a little heart and roses to finish my project. 


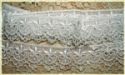
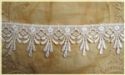
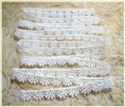
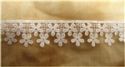
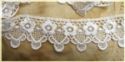
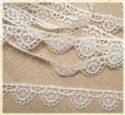
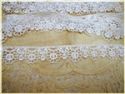
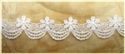
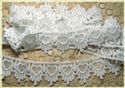
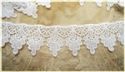
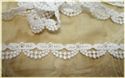
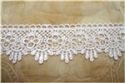
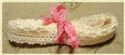
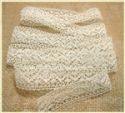
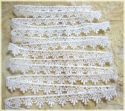
.just like the background I used the PanPastels for the front...the Dyan Reavely Stencils and the glossy and crackle accents.....I wanted to use a piece of lace too....it was white but you can easily work on them with the pans too....
I hope you like what I made for your inspiration and hopefully it gives you lots of ideas to make your project.
So you want to have fun too....then you should check out the PanPastel UK Challenge Blog and join into the fun. And fun is what your going to have....and while your there, check out my amazing teamies creations, your gonna love them.....
Most of all have lots of fun playing, I can't wait what your going to create.....


woensdag 20 februari 2013

FRILLY AND FUNKIE CHALLENGE, LAYER IT ON AND SHARE A WORD, OUR HOSTESS IS SUE.....


Hey there guys it is Wednesday soooooo that means we have another fabulous challenge over at the

  FRILLIE AND FUNKY Challenge Blog...


Did you ever check out Linda's Shop, you didn't....ohhh my goodness you should check it out right away, Linda has lots of fabulous stuff for you crafters out there, your gonna love it......ANDDDD lots of NEW goodies are waiting for you.......you better believe it, cause it is just like that, a fabulous place to snoop around and order all your fabulous goodies .....wohoooooo come on over and check it out oke....your gonna have fun. Just click the Blinky and it will take you there


Oke so here we go with my take on the Challenge for this week....the theme this week is.....
Layer it ON and Share A Word and our lovely hostess for this week is Sue

We would like to see lots of layers 
You could use layers of paint, fabric or whatever else you have to hand....The focal point of your project should be a WORD.......so surprise us and let's get crafty guys....

I thought Spring will be here in a jiffi, so why not make a Spring Bouquet eh? So what I did was ................ 

I started out making the vase.....lots of Dyan Reavely Stencils were used and I stamped with lots of bright colours....Spring is about lots of colour so why not make a vase with lots of them right.......I have worked with lots of LAYERS....yep I sure did......


And I colored some white Venise lace with the blue-ish colour and placed my lace on top of the vase


I cut out 11 Roses and embossed them with the Embossing folders from The Tim Holtz......after that ......


I played with the roses with ....lots of Distress Stains  ...can you tell hihihi and got my heattool to work for a bit and dried the roses....after that I roled them up in the shape of the Rose and put some Glossy Accents on it.....to glue them onto a stick to make sure the Roses look like real roses....and what cannot be forgotten is offcourse the little leaves....


The only thing that I was missing were my words......and instead of just ONE word I just HAD to use a few words, placed them on a tiny Tim Tag and a Pen Nib and walla my project is done.........


So I hope you like what I made for your inspiration guys......I am very pleased with my project for this weeks challenge over at the Frilly and Funkie Blog......so you wanna have lots of fun too....then you should come over and do join into the fun.....and you should check out my AMAZING teamies creations your just gonna love what your about to see, and it is for your inspiration....so what are you waiting for guys.....come on over.....wohooooo
And most of all.........
HAVE LOTS OF FUN.....and ENJOY....


zondag 17 februari 2013

PANPASTEL UK CHALLENGE #7 JUST TWO COLOURS .....


Welcome to another fabulous day, today it is Sunday so we have another fabby Challenge over at the 


Our GENEROUS SPONSOR is 


Did you ever visit their store.......you should, cause what they have in their shop is FANTABULOUS...you should see all the products.....just click the blinky and it will take you there.......

This week over at the PanPastel UK Challenge Blog we have a challenge theme called, Just Two Colours......

And this is what I made.......Can you quess what it is??


I used two colours and yep you quessed right....black and white..perhaps it looks like an altered picture, but it is not....a vintagy one even ..but it is not....It is Black and White......I played around with Lots of Black Pans and White PanPastels.....this fabulous butterfly  is from The Wendy Vecchi and is worked with the light Black one and on top crackle..the same goes for the purse. 


On the side of my project I placed two hearts and on top I used Gesso, rubbed it in a bit and played with yep Crackle again....and decided that it looked just the way I wanted it too.


On top of my project I placed a few white flowers....and worked on them yep with the Black PanPastel it looks really great, even better then on the picture. I played a bit with the Glossy Accents and Crackle Accents on top to give it a bit of a glaze look......and it worked out pretty good I think....so what do you think?


Oke and this Dreamer girl is in the middle of my project.....can you see what I made?????? I worked on this precious little dreamer girl with PanPastel Black and yep on top the Crackle Accents....see I am a Crackle addict lol....they even call me the Crackle Queen LOL.....and me thinks you know WHY????????


Did you think that I had made a Frame......you didn't? lol.....yep I did...I have played with the the Tim Tissue Tape on the frame itself....and on top of the frame I worked with how can you quess......with PanPastel and this time it is the white one....so  you like what I made.....I never thought that on a frame theh white and black colours would look that good.....I am very pleased with it....so you wanna have lots of fun too guys.....then you really should come on over to the PanPastel UK Challenge Blog...and check out my amazing teamies fabulous Just Two Colours Projects out....you will love it......and if you play along with the challenge you can even win a fabulous prize and play with PanPastels yourself......so come on over and have lots of fun.....
Thank you so much for listening and reading my story......for this weeks Challenge.....and if you would like to leave me a little love that would be just great....I really love reading them.


xxxxx

vrijdag 15 februari 2013

FRIDAY FOCUS ON FRILLY AND FUNKY....WHAT TO DO WITH THAT FABULOUS LACE.....

Hey there guys, it is my turn to show you this week's Friday Focus using the fabulous Venise Lace that Linda sells in her shop.


 I chose the Venise Lace that I have in my Craftroom but there are a lot more in Linda's Store. You really should check it out, because as our Friday Focus product, it is an additional 15% off the already low prices that Linda offers in 


Oke, so perhaps you think why is she working with the white and almost white lace? Well I will tell you why, you can use your lace just with the white color but you can also work on them with Inks, Distress Stains, Glimmer mist and even Distress Markers......And the good part on lace is, that you can always work WITH them on your projects, there is always a little place on your project where you can place the lace. I just love working withlLace and I think it gives it THAT special look. I think that I am an addict lol....


I have worked with these fabby products from Linda's store....Some Stencils from Dyan Reavely, the Stampset from Tim Holtz and offcourse that fabby stampset from The Wendy Vecchi.


I decided to show you 2 different sides of a Goodiebag and what you can do with the lace...One side is worked with the plain white Venice Lace 


Oke so I was telling you about those fabby stencils from Dyan Reavely, I love working with them I used the  Distress Inks such as Victorian Velvet, Fired Brick and Spun Sugar as well.  Stamped a on the front and worked with the White Paint Dabber as well.


The back of the Goodiebag is worked with the simular products but is completely different.


Then I thought I would stamp up a Butterfly from the gorgeous stampset Blueprints from the Tim Holtz and colored it with the Distress Markers.


Oke so here is the front of the Goodiebag, I worked with the white Venise Lace, I placed the lace underneath my image, that always looks nice, so you can do that....and at the bottom and the top of the Goodiebag. To finish the front I placed the metal Filigree embellishment with the hearts. Linda has crinoline in her shop too, You see the red colored and pink colored pieces of ribbon on top? They were white before I got my hands on it. The Crinoline is very easy to color. You can just spray some distress ink, dab with the distress stain or spray some glimmermist on to it, then dry with the heat tool and your crinoline is colored beautifully. And the good part is you can give it any color you want to fit your project. 


So the Frayed Flower was white but I wanted it to be a bit pinkish....what I did was, I played with Distress Stains such as Fired Brick, Spun Sugar and White Picket Fence....I was not happy with the color it turned out to be so I played some more with the Glimmer Mist and added some water. Then I was happy with it. When you add color to your Lace you will have to make sure it is dry before you apply it onto your project, especially when it is a paper project. So what I did was, I took my heat tool and dried the lace with it before I applied it on to my project.


I thought something was missing underneath my heart so I wanted to add lace underneath to give it a classy look.  So another thing I did was, I took the creamy colored ribbon and started with the Distress Stain and Glimmermist to give it a different color. You should have seen my fingers lol....it was like my fingers were bleeding they had such a red color......but when you look at the ribbon you would get a different idea because it is not THAT red eh? It is so much fun to play around with white lace and give it a color you want ...


Oke so this is the finished back of the Goodiebag I have worked with the colored lace.....Hope you like how it turned out. So one last thing for me to say is I wish you lots of fun playing around with the lace and hope you check out Linda's store for the absolutely fabulous Venise Lace that she has there waiting for you.


Hugs Terry 
xxxx