woensdag 29 mei 2013

FRILLY AND FUNKIE CHALLENGE HOLIDAY DESTINATIONS THROUGH A WINDOW......AND MOREEE

Hey there guys it is Wednesday soooooo that means we have another fabulous challenge over at the

  FRILLIE AND FUNKY Challenge Blog...


Did you ever check out Linda's Shop, you didn't....ohhh my goodness you should check it out right away, Linda has lots of fabulous stuff for you crafters out there, your gonna love it......ANDDDD lots of NEW goodies are waiting for you.......you better believe it, cause it is just like that, a fabulous place to snoop around and order all your fabulous goodies .....wohoooooo come on over and check it out oke....your gonna have fun. Just click the Blinky and it will take you there


Oke so here we go with my take on the Challenge for this week....the theme this week is.....Holiday Destinations Through a Window.......our lovely Host for this fortnights challenge is Jenny.....and she is saying as thoughts turn to holidays at home and abroad its time think about your favourite or ideal holiday destinations....What would your dream scene be? And please don't forget to include a window in your project......This is what I made.....When I am thinking about Holiday Destinations, it is my Home where my family is, I just love holidays at home where there is no alarm clock, doing what you want to do and enjoy the special time with your family at home.......


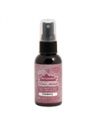
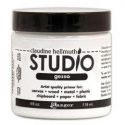
I made a home wallhanger.....and I started out offcourse with the background ....it was a white one but I thought how about first.....Gesso, then the Pinkish color of Adirondack Color Wash with lots of water.....just sprayed it on top and let it drip off....then I got the Papillon background stamp from The Tim Holtz and started stamping up the dried up colors......


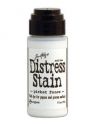
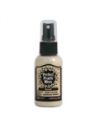
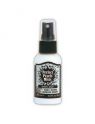
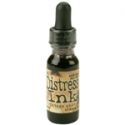
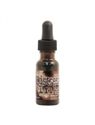
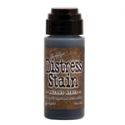
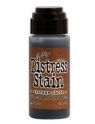
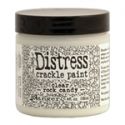
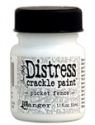
Oke so here is the fabulous window where the windows really open up....I thought this one was so cool to work with.....my sweet friend sent the window as a gift....I worked on it with gesso and yep distress inks and offcourse the Crackle.....and on top of that another layer of Ink....the Vintage Photo and Walnut Stain were used for the window.....


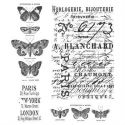
Then I had this awesome butterfly from The Wendy....still in love with her butterflies, so thank you Wendy for this one, I love it........and I played around with Perfect Pearls and on top Utee.....


And at the bottom of the Wallhanger I placed the letters LOVE.....they were sent to me by my other special and deer friend....I had them in my closet and now they came in very handy......


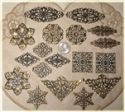
And offcourse where there is a top there is a bottom....so this fabulous metall filligree was just perfect to finish the Wallhanger with....I love it it has all these fabby hearts in it...I just don't love the crackle I loveeeee hearts too.....


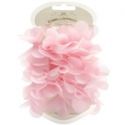
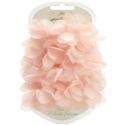
And this is my project when it is finished....did you think it would look like this????? I just love the Melissa Francis Tulle Trim.....So guys what do ya think......this is when the window is closed.......

And this is a picci when the window is open....and what do you see lol....yep another heart.....so what does this project tell ya.......The people who know me know just what I mean with it.....This time I had lots of  fun with the all of the products ...I am yep again pretty pleased about it......so you wanna have fun too....then I suggest you come on over to the Frilly and Funkie Challenge Blog and dooooo join into the fun, my amazing teamies from the Frilly Team made some fabulous projects for you for your inspiration. Don't forget to check out their blogs so you can see more detaills on their projects.....so let's have some fun .......

I want to join into the fun over at the following challenge blogs:

Simon Says Stamp and Show, Challenge #Into the Woods. I have used a wooden heart behind the window that I think looks like wood. And offcourse the wallhanger is a wooden one. 

Thank you so much for checking out my blog and if you would like to leave me a little comment, then please do, I would really appreciate it.

Hugs Terry
 xxxx


zondag 26 mei 2013

PANPASTEL UK CHALLENGE #21, BLING IT.....


Hey there guys, it is Sunday, so that means we have another fabulous challenge over at the PANPASTEL UK Challenge Blog...
Did you ever visit out 
 generous sponsor 


they have a fabulous prize for the winner of the challenge.....check out the store guys, and you will have fun

The theme for this weeks challenge is Bling it.....so you can make whatever you like as long as it has BLING on it.....this is what I made....

I played around with a butterfly from Tim Holtz....I embossed it and used some inks on it.....and placed a tiny heart in the middle.....


The background of my project was worked on with lots of yep Gesso, Light Modelling Paste and this fabby stencil.....on top I used Panpastel and Perfect Pearls.....the shiny one, but on the picture is is difficult to see.


Check this Blingy heart out....don't you just love it....I know I do....the sentiment is from Tim Holtz too, from the same stampset as the butterfly.....I worked on the heart with Crackle and Embossing powder.....


So if you did not know what I made in the beginning of this post....now you know....It is a Huge Butterfly a wooden one and I made a Wallhanger out of it......and the background is all covered with Gesso and Light Moddeling Paste...just love that stuff......and so it's the little things that make life big....you now know what I mean with that eh? 
You wanna have fun too guys....then you really should come over to the PanPastel UK Challenge Blog and join into the fun. My amazing teamies made lost of fabulous projects for you for your inspiration and let's BLING IT guys.....Have loads of fun....

Thank you for visiting my blog and if you wanna leave me a little comment that would be just great......

Hugs Terry 
xxxx


zondag 19 mei 2013

PANPASTEL UK CHALLENGE #20, NEW BEGINNINGS......


Hey goodmorning on this fabulous Sunday,we have another fabby Challenge over at the 

Did you ever visit our 
 generous sponsor 


they have a fabulous prize for the winner of the challenge.....check out the store guys, and you will have fun and will find everything you  need to keep on crafting....wohooooo check this out ...
This week over at the PanPastel UK Challenge Blog we have a challenge theme called, New Beginnings....and you can make whatever you like aslong as it has everything to do with a NEW BEGINNING.....this is what I made...


First I will show you the bottom of a FRAME........what kind you will see in a minute...if you follow the pictures you will see....I worked on a heart with crackle and PanPastels....it is so much fun to work with the Pans.....


So this is the top of the frame.....and I placed a tiny sentiment with LOVE....and yep I tight a knot and a bow on it.....


And I could not help myself and just had to use this cute and romantic image of a couple....and all around them the fabby lacy that I had in my closet......


So here you can see the side of the FRAME that I worked on.....still don't have a clue what kind of a frame it is eh? lol......it's coming trust me.....so this way you can see I played around with the pearly lace all around the frame....and I just love it...


And here is my finished project, did you think I made a heartshaped frame......lol....I think you knew allready eh? But anyways....The background of the frame was worked on with lots of Gesso and Crackle...and on top...to give it a more fragile look....lots of Brown PanPastel.....everything was worked on with the Brown PanPastel....and I just love it....I hope you like what I made.....I am in love with it....it just has enough embellishments on top.....

So you wanna have fun too.....then you come on over to the


and do join into the fun because fun is what your going to have, I am sure of it.......and while your their, check out my amazing teamies individual blogs too. What your about to see is just such eyecandy.....Thanksss for watching and listening into my blog guys....and if you wanna leave me a little comment be my quest, much appreciated.

Hugs Terry
 xxxx


zaterdag 18 mei 2013

FRILLY AND FUNKIE SATURDAYS STEPXSTEP, ALTERED FRAME FUN TUTORIAL......


Hey there guys it is Saturday so that means it is TIME for another STEPXSTEP....this time it is my turn, Terry....and I will show you what I made in a "few" steps.....


Oke so what I did was ....I had a frame in my closet and I thought that would be nice to alter it...so what I did was, I took the inside out the background looks awefull eh? so ...

So....what better way to work on the background with the Tissue Tape from The Tim Holtz....

After the Tissue Tape was placed, I thought why not use the stencil and use the Molding Paste also.


Then you get this...the background looks different eh? lol...thought so.....


Then I cut out a few hearts from corrugated card and worked on it with the Adirondack Color Wash and the Distress Crackle Paint....you get an amazing result if you use both products....

So first the corrugated card on top of the wooden hearts.....and after...
I sprayed the Adirondack Color Wash on top.....and yep on top of that layer, the crackle Distress Paint 


When the four hearts were ready I placed them on the background that goes inside the frame...


But only four hearts on the background was not enough, so perhaps some lace colored with the Adirondack Color Wash would do the trick.....


This is the result of the colored lace....I love the color it has now.....don't you just love it.....

Oke now were getting to the background of the Frame itself....I played around with lots of Crackle and yep Vintage Photo, the stencil is really lots of fun to use on the background, not THAT much but just a little bit to let you see a difference in different textures.....


Now the four finished hearts can find their place inside the frame....I worked a bit more on the colour on the frame itself.....


And to give the frame a bit more, I played around with another heart...offcourse I used crackle again lol....just love that crackled look....and a nice sentiment on top...


And offcourse a Tim Holtz corner to finish the heart embellishment on top....


And still I was not pleased with the bottom...so I found some roses and a piece of lace.....just love Linda's lace...did you see all the fabulous laces she has in her shop.......complete yummieness....and yep I colored the lace too with a bit of rusty colours and the roses on top....now I was getting somewhere....


So this is the result of my Saturday StepXStep....A altered frame and offcourse since all my projects have a hidden meaning behind it...can you tell what I want to express with my project? You think about what I mean......and offcourse you can tell me .....
Thank you so much for checking out the Saturday StepXStep and I hope I have helped you a bit with what you can do with a simple 'old' frame....and the New frame you can make out of it.....

Have loadsssss of fun guys.....
Hugs Terry xxxx